How to Make Chords Using the Standard Editor
Welcome to the modernized Chords and Intervals tool! This powerful feature makes it easy to create complex chords and intervals in your guitar tablature. Whether you're building custom chord voicings or browsing from our extensive chord library, this tool streamlines your creative workflow.
This guide will walk you through everything from opening the tool to inserting chords, searching our library, and saving your own custom creations.
Getting Started: Opening the Chords and Intervals Tool
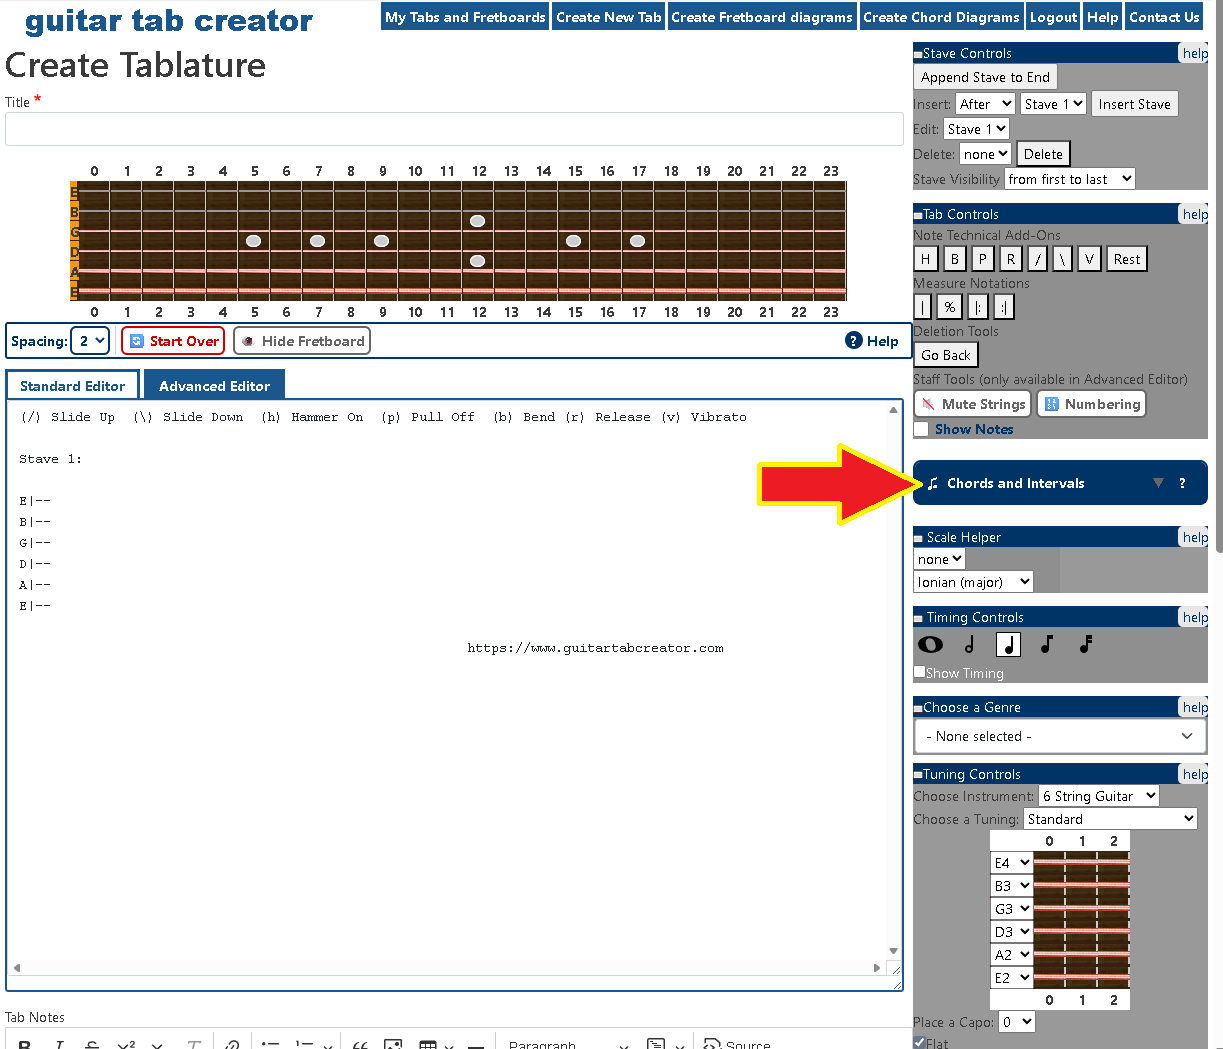
Understanding Chord Types
The Chords and Intervals tool provides access to three different types of chords, each distinguished by a unique background color:
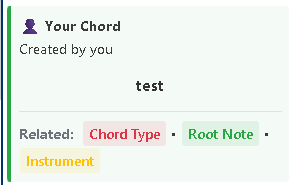
Your Chords (Green) - Chords that you've created and saved to your personal collection. These are private to your account and only visible to you.
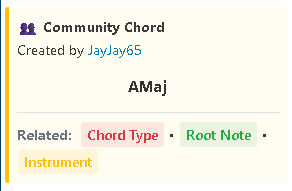
Community Chords (Yellow) - Chords created by other users and shared with the community. These chords have been published publicly and are available for anyone to use.
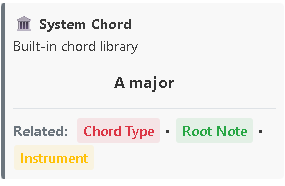
System Chords (Grey) - Built-in chords from our comprehensive chord library. These are pre-configured, professionally vetted chord voicings covering common chord types.
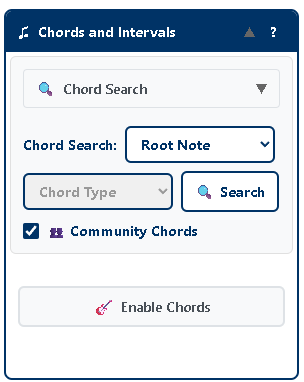
Searching for Chords
One of the most powerful features of the new tool is the ability to search through thousands of chord variations quickly and easily.
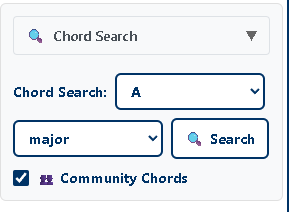
Using the Chord Search
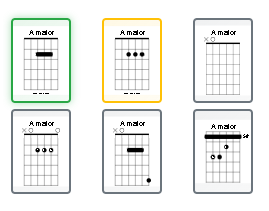
Browsing Search Results
When you search for chords, the results appear in an interactive gallery view showing thumbnail previews of each chord variation. This visual approach makes it easy to find exactly the voicing you're looking for.
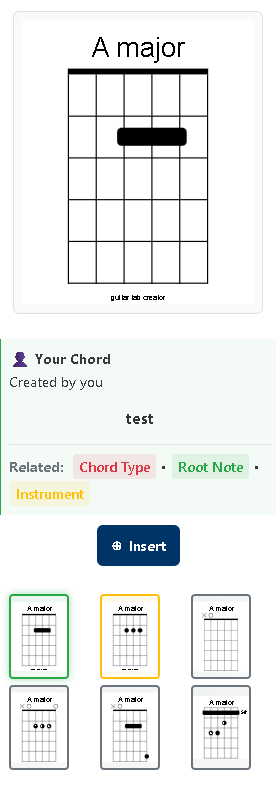
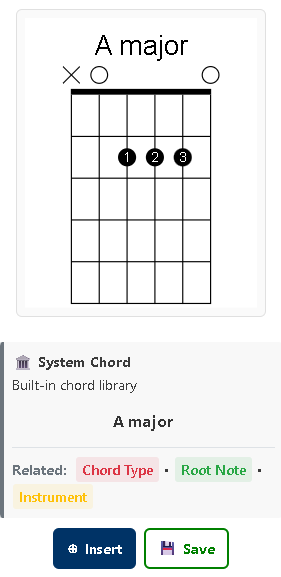
Viewing Chord Details: Click on any thumbnail in the gallery to select that chord. The chord diagram will enlarge, and you'll see detailed information including:
- The chord type (User, Community, or System) with corresponding color coding
- Author information (for User and Community chords)
- Chord title/name
- Links to related taxonomy pages for the root note and chord type
 |  |  |
Creating Your Own Chords
In addition to searching our library, you can build custom chord voicings from scratch - perfect for unique inversions, extended chords, or experimental harmonies.
Enabling Chord Mode
Step 1: Click the "Enable Chords" button
Note: This replaces the old "Vertically Stack Notes" feature with a more intuitive interface.

Step 2: Once chord mode is enabled, the interface updates to show:
- "Enable Notes" button - Click this to return to single-note entry mode
- "New Chord" button - Click this to move forward in your tablature and start a new chord
- An active fretboard ready for chord input

Building Chords on the Fretboard
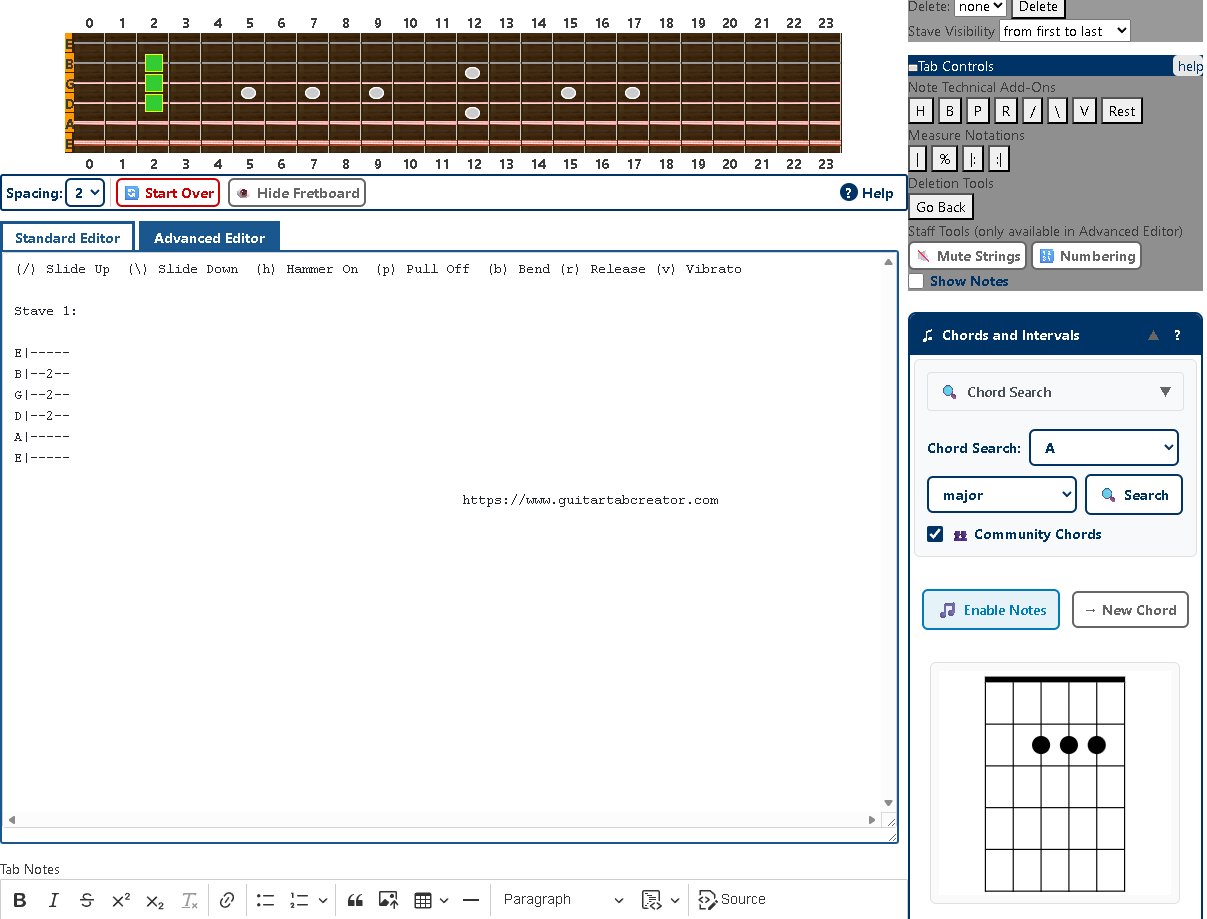
Inserting Chords into Your Tablature
Once you've found or created the perfect chord, inserting it into your tablature is simple:
For Searched Chords:
- Click on the desired chord thumbnail in the gallery to select it
- Click the "Insert" button
- The chord will be added to your tablature at the current cursor position
For Custom Chords:
- Build your chord by clicking notes on the fretboard
- The chord is automatically added to the tablature when you click "New Chord" or switch back to notes mode
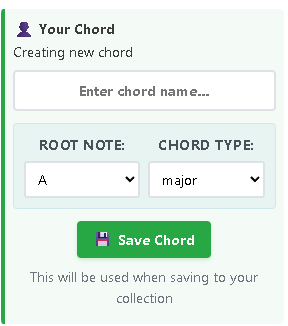
Saving Chords to Your Collection
When you create a custom chord or find a Community/System chord you love, you can save it to your personal collection for easy access later.
Note for Anonymous Users
You must be signed in to save chords to your collection. If you're not logged in, you can still insert chords into your tablature, but the save feature will be unavailable.
Saving a Custom Chord You've Created
Saving Community or System Chords
You can also save Community (yellow) or System (grey) chords to your personal collection:
Important Note
You cannot save a chord that already exists in your collection. If you select one of your own chords (green background), the "Save" button will be hidden since it's already in your library.
Understanding the Chord Information Box
When viewing any chord from the search results, the chord information box provides valuable context:
Information Displayed:
- Source Type Icon & Label: Visual indicator showing whether it's Your Chord (👤), Community Chord (👥), or System Chord (🏛️)
- Author Information: For Community chords, shows who created it with a link to their profile
- Chord Title: The name assigned to the chord
- Related Links: Clickable links to taxonomy pages for:
- Chord Type - Browse all chords of this type
- Root Note - Browse all chords with this root note

Tips for Effective Chord Creation
Visualization
Use the real-time chord diagram preview as you build your chord. This visual feedback helps you see the shape and spacing of your voicing instantly.
Minimum Notes Required
A chord must have at least 2 notes before you can save it. The "Save Chord" button will remain disabled until you've placed at least two notes on the fretboard.
Experiment with Community Chords
Don't forget to check the "Community Chords" checkbox when searching! You'll discover creative voicings and variations contributed by fellow musicians that you might not have thought of.
Organize with Descriptive Titles
When saving custom chords, use clear, descriptive titles that will help you find them later. Include the position or unique characteristics (e.g., "A Minor - 5th Fret Position" or "G7 - Open Voicing").
Regular Saving
Get in the habit of saving interesting chord voicings you create. Building a personal library of chords makes your future composing and arranging work much faster!
Workflow Summary
Quick Reference: Inserting a Chord from the Library
- Click "Chords and Intervals" header to open the tool
- Select Root Note and Chord Type
- (Optional) Check "Community Chords" for more results
- Click "Search"
- Browse the gallery and click a thumbnail to select
- Click "Insert" to add to your tablature
Quick Reference: Creating and Saving a Custom Chord
- Click "Chords and Intervals" header to open the tool
- Click "Enable Chords"
- Click on the fretboard to place notes (minimum 2 notes)
- Enter a title for your chord
- Select Root Note and Chord Type
- Click "Save Chord"
- Use "New Chord" to continue or "Enable Notes" to switch back
Conclusion
The Chords and Intervals tool brings together the best of both worlds: a comprehensive searchable library of chord voicings and the flexibility to create your own custom chords. Whether you're a beginner looking for standard chord shapes or an advanced player crafting complex jazz voicings, this tool adapts to your needs.
Take time to explore the different chord types, experiment with the fretboard, and build your personal chord library. The visual feedback and intuitive interface make chord creation faster and more enjoyable than ever before.
Happy chord building!